
Setup your own blog from scratch using Jekyll
by Denis Kovalev
I assume you start with a personal Linux/macOS machine and some basic knowledge of how to setup a server. By the end of this article you’ll have your own independent blog running in the web and you’ll be able to post new articles from your laptop using only several commands. Your visitors will be able to post comments to your articles and subscribe to new posts via RSS.
Expected monthly expenses are about $8-9.
Stack
We’ll create a static blog using Jekyll and Markdown and test/publish it using Docker. The blog code will be hosted on GitHub. Next paragraphs will explain the choice of such stack. If you are already convinced and want to start right away, go to next section below.
Dynamic or static
Dynamic web pages are suitable for interactive content, when a visitor can alter the page look in some way. Or the same page may be displayed differently at some time. In case of a blog of one person, its visitor is only a viewer so no complex JavaScript is necessary and plain HTML is more than enough. Also with a static website the content is prepared locally first, so you can draft an article for several days before actually posting it online.
Markdown or HTML
A blog is basically a collection of articles. After the blog is setup and running the most common interaction with it for the author is writing new articles. And while we may encounter some difficulties in server and website configuration, the posts creation should be easy and clear.
There’re several options for this:
- One is a online form to write a post. That’s a prerogative of dynamic website and is used across blog CMS like LiveJournal, Blogger, Wordpress and others. In our case of static website we need simpler and more lower-level solution, where we have more control over raw content.
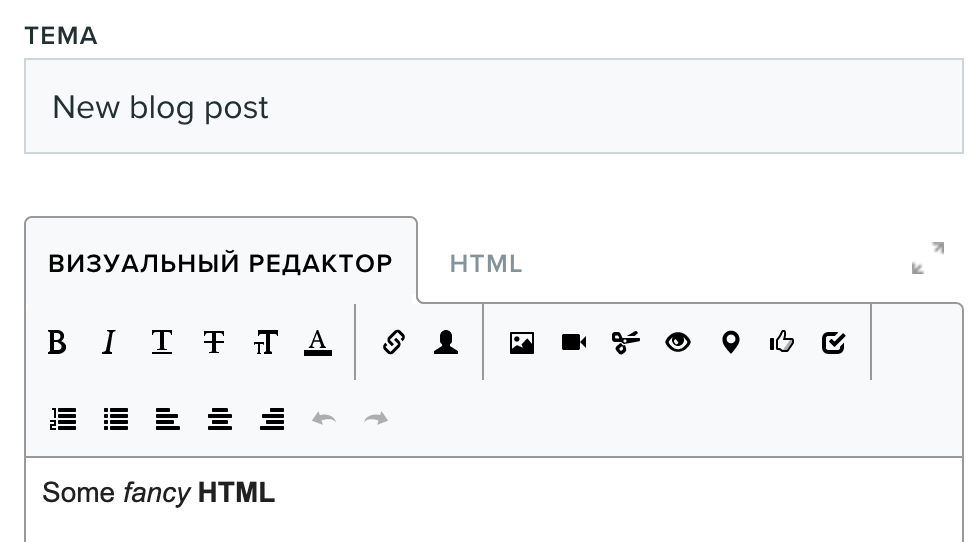
- So we come to the second option: write posts in HTML and CSS. While they are flexible and powerful tools for page markup and style, the post is unreadable before it’s rendered. Plus changing website theme after several months and a dozen of posts published can be a challenge. It’ll require some tedious work to change each page structure, update HTML elements tags and classes. And the more posts there are, the more complex this process will be.
- What if we could write posts in plain-text and then automatically convert them to HTML pages? That’s where Markdown comes to rescue. It’s a wise-spread light markup language with a lot of libraries for HTML convertion. More specifically we’ll be using Jekyll and Kramdown.
Setup website locally
Jekyll template
You can craft your own or simply choose any from the vast selection of already available ones: https://jekyllthemes.io/, http://jekyllthemes.org/, http://themes.jekyllrc.org/ and others. If you choose to download a theme it usually comes with its own manual to run it locally. E.g. this blog is based on Centrarium theme that has a nice README with all the necessary info. Be sure to play around with the chosen template and also look through Jekyll basics.
In general after this step you should have a local directory with a website template.
Git repo
Before you start to edit the template and fill it with personal data, make sure to arrange a git repo for it. It’ll allow you to keep track of your posts and edits, be able to save and load your drafts and make future enhancements without breaking your main workflow.
If you want to preserve the template commit history by the original author in your project, see the corresponding Github manual.
Docker
Docker will help you to isolate blog dependencies from your system and ease the deploy procedure. See its install section for instructions for your system.
After you install Docker, put these two files to the root of your project.
Dockerfile with the contents:
FROM ubuntu:16.04

RUN apt-get update
RUN apt-get install -y jekyll bundler

RUN mkdir /my.blog
WORKDIR /my.blog
COPY Gemfile* ./
RUN bundle install
RUN rm Gemfile*

CMD ["jekyll", "serve"]
and Makefile, here I assume you expose port 4000 in your blog config:
PROJECT := my.blog

docker-build:
	docker build -t $(PROJECT) .

docker-run:
	docker run -it --rm -p 127.0.0.1:4000:4000 -v $(CURDIR):/$(PROJECT) $(PROJECT)
Now you can build docker image:
make docker-build
and run your website locally:
make docker-run
Comments
Since your website is static we can’t save user comments, so we need some third-party service to do this work. There’s a number of options to choose from: Disqus, Discourse, Just comments, Remark42, Isso and others. No matter what you choose make sure you understand how it’s integrated in your Jekyll blog template. E.g. Disqus has easy to use instructions for Jekyll website.
Go online
By this point you should be able to run your website locally, create posts and add comments to them. Now it’s time to publish your blog online.
Server setup
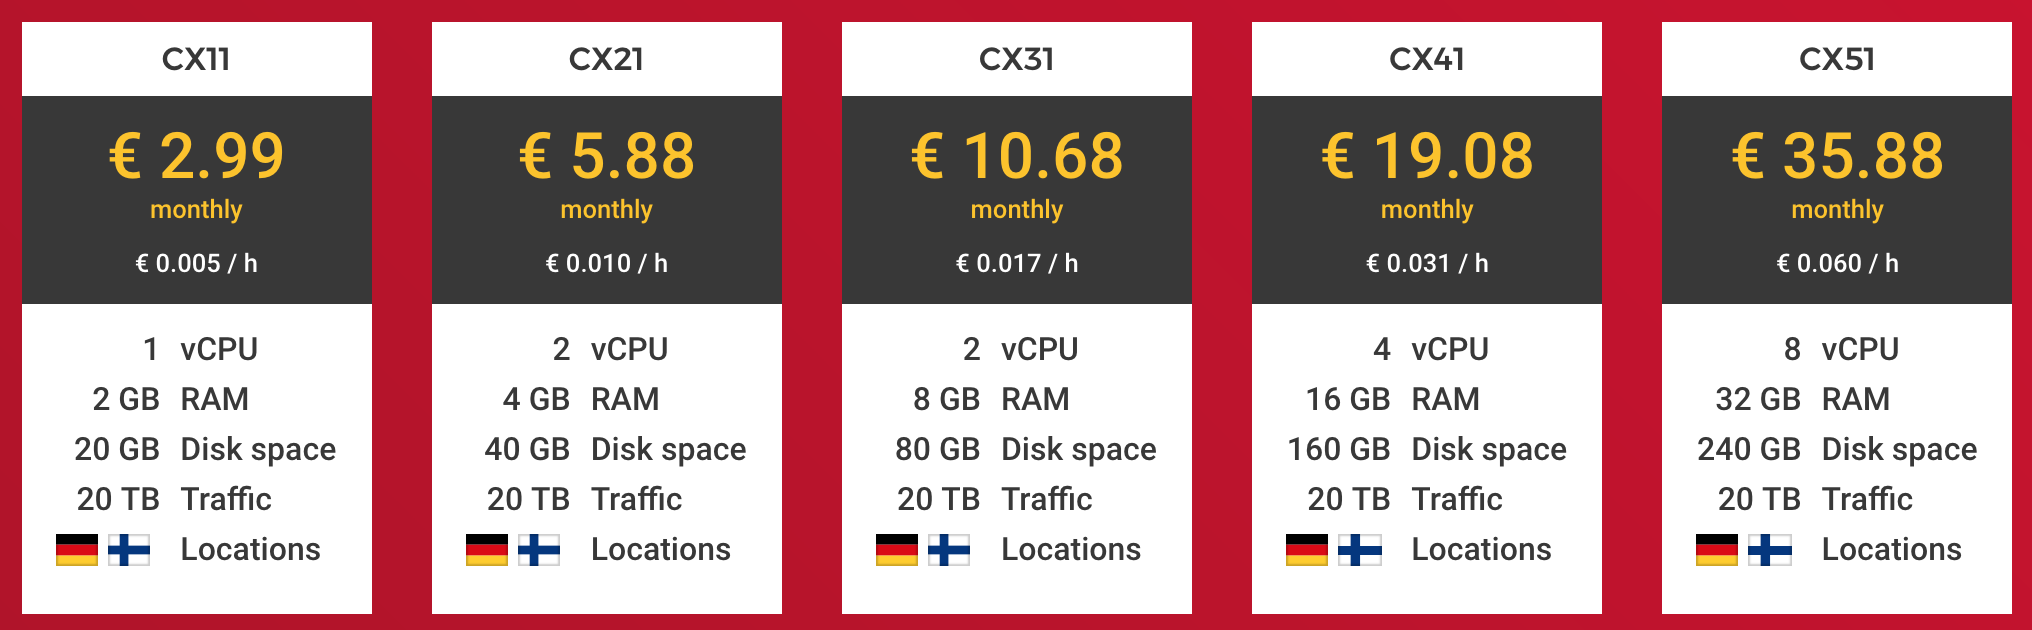
VPC hosting is rather cheap nowadays. You may look at Hetzner or DigitalOcean for available offers. Note that Hetzner being cheaper lacks some functionality and is available only in EU region. But it can be overcome with some CND. You can have a decent Heztner cloud server for just €2.99 per month:
 As you already setup your blog to use Docker all you need is install nginx and Docker to your newly bought server too.
Avg. price: $4/month
Systemd
Running make docker-run manually on the remote server is fine for development phase but ideally we want the server itself handle your website and start it up upon restarts and failures.
We’ll create a systemd service for your blog. Create a file /lib/systemd/system/my-blog.service on the remote server:
[Unit]
Description=My blog service

[Service]
Type=simple
WorkingDirectory=/path/to/jekyll/website/
ExecStart=/usr/bin/docker run --rm -p 127.0.0.1:4000:4000 --env JEKYLL_ENV=production -v /opt/example.com:/example.com example.com
KillMode=process
Restart=on-failure

[Install]
WantedBy=multi-user.target
And enable it for autostart with the system:
systemctl enable my-blog
Now you can start and stop your blog service using systemctl commands.
Hostname
You need to think of and register the hostname for your future blog using any of the trusted domain name registrars: Domain.com, GoDaddy, Bluehost and other. Each of them provide instructions on how to configure your hostname and make it available to the public.
Avg. price: $4.5/month
SSL/TLS
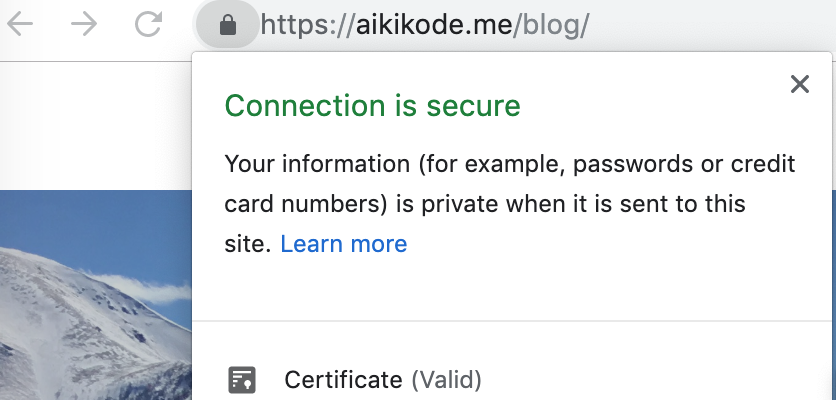
Nowadays browsers show nasty warning in the address bar for websites that use HTTP.
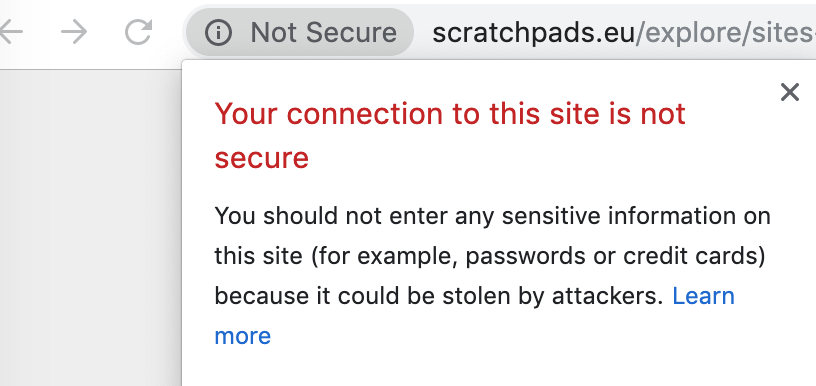 Even if your visitors don’t post any personal data at your blog and their data is safe this warning discredits your setup. Fortunately Letsencrypt service provides easy to use and free Certificate Authority and you’ll have SSL/TLS enabled in no time.
Sample nginx configuration
Let’s arrange all the things together now. I’ll assume you use example.com as your hostname and your blog lives in root domain: example.com/. You’ll need to change these values in the configs below to your hostname. Here’s an example setup of your personal server with your blog running on http://127.0.0.0.1:4000 locally.
Add nginx /etc/nginx/sites-available/example.com file:
# Redirect all http -> https
server {
    server_name www.example.com example.com;
    return 301 https://example.com$request_uri;
}

# Redirect https://www.example.com -> https://example.com
server {
  listen 443 ssl;

  # Certificates obtained from Letsencrypt step
  ssl_certificate     /etc/letsencrypt/live/example.com/fullchain.pem;
  ssl_certificate_key /etc/letsencrypt/live/example.com/privkey.pem;

  server_name www.example.com;
  return 301 https://example.com$request_uri;
}

# Main server handler
server {
  listen 443 ssl;
  server_name example.com;

  # Certificates obtained from Letsencrypt step
  ssl_certificate     /etc/letsencrypt/live/example.com/fullchain.pem;
  ssl_certificate_key /etc/letsencrypt/live/example.com/privkey.pem;

  # Force trailing slash in the url
  rewrite ^([^.]*[^/])$ $1/ permanent;

  # Pass all requests to your local Docker service
  location / {
    proxy_pass http://127.0.0.1:4000;
  }
}
And add it to enabled sites:
ln -s /etc/nginx/sites-available/example.com /etc/nginx/sites-enabled/
systemctl restart nginx
Now your website should be available online via your selected hostname.
New posts
The workflow for the new posts is:
- Create a new
YYYY-MM-DD-title.mdpost in_postsdirectory - Run your blog locally to verify
make docker-run - Push your changes to the repository:
git add --update git ci -m 'New post' git push origin master - Login to your remote server and obtain the changes:
cd /where/your/blog/is/located/
git pull
Jekyll will automatically rebuild the website and new post will appear online. However if you make some configuration changes to the website (e.g. edit
_config.yml) you’ll also need to restart docker website service:systemctl restart my-blog
What next
This section describes various improvements over your current setup.
Jekyll plugins
Jekyll has a nice collection of plugins that can greatly extend its functionality. I personally ose the following:
- jekyll-archives - tag-based separate pages
- jekyll-sitemap - generate site map in the footer
- jekyll-paginate - fancy pagination of your posts on the main page
- jekyll-redirect-from - specify multiple redirections URLs for your posts
- jekyll-feed - generate an Atom (RSS-like) feed of your Jekyll posts
CI
It may be tedious to have to login to your server every time you write a post to do git pull. CircleCI may automate this step for you. Specific CI setup is out of scope of this post.
Analytics
If you are interested in your audience, which articles are more popular and general user statistics you should consider adding Google Analytics to your blog. You simply add a special block if JavaScript code into page footer and then be able to view various metrics in the Dashboard.
Subscribe via RSS